
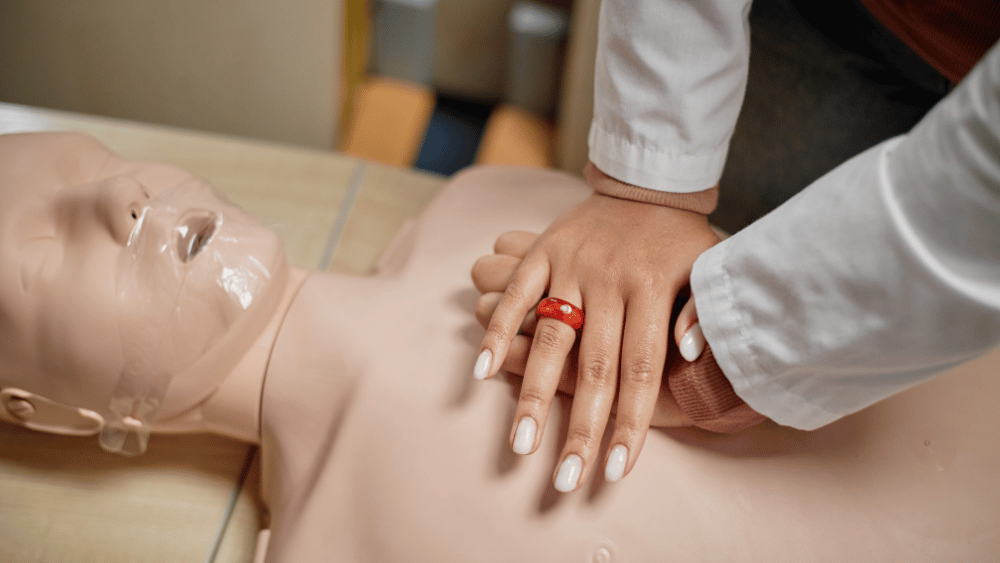
Would you know exactly where to place your hands if someone suddenly collapsed in front of you and required CPR? Remember, even a small mistake in positioning can significantly reduce the effectiveness of chest compressions as the victim continues to fight for their life. According to the American Heart Association, high-quality CPR acts as a substitute for the heartbeat and can double or triple a cardiac arrest victim’s chance of survival. However, adequate perfusion relies heavily on proper CPR hand placement and technique. Moreover, mastering the mechanics of chest compressions is a core part of CPR/AED certification that employers and healthcare facilities expect. So, read on to learn everything, such as the differences between adult, child, and infant techniques, so you’re not left guessing when seconds count.
Why Proper Hand Placement Matters in CPR
Every minute without adequate circulation reduces survival chances by 7–10%. You can increase a victim’s odds of survival with your understanding of the correct hand placement, especially during a cardiac arrest. That’s why it’s recommended to follow standard protocols based on the patient’s age and body size. You’ll practice this step in detail during CPR/AED certification training.
Standard Hand Placement for Adults
Use the two-handed technique as the default for adults and adolescents:
- Hand 1: Place the heel of your dominant hand on the center of the person’s chest, on the lower half of the breastbone (sternum).
- Hand 2: Place the heel of your other hand directly on top of the first hand and interlock your fingers.
The goal is to compress the heart between the breastbone and the spine to manually pump blood. Emergency responders or bystanders should aim to begin compressions immediately after confirming cardiac arrest.
Note: Ensure your fingers are pulled up and not pressing into the ribs. Applying pressure to the ribs can cause fractures and does not increase blood flow.
Ensure Proper Body Mechanics
You must position your body correctly to deliver effective force. Kneel beside the victim’s chest. Straighten your arms and lock your elbows so that your shoulders are placed directly over your hands. This allows you to use your upper-body weight to push down rather than just your arm muscles, preventing fatigue and ensuring consistent depth. If you bend your elbows, the quality of compressions will drop quickly.
Ensure a Firm Surface
If the patient is lying on a soft mattress or a couch, move them to the floor if it’s safe to do so. Soft surfaces absorb the force of your compressions, making them less effective at squeezing the heart. A few seconds of repositioning on a firm, flat surface can make your CPR efforts much more effective at generating blood flow.
Are There Any Variations in Hand Placement?
Yes, while standard hand placement works for most scenarios, there are several exceptions you should be aware of. Factors like pregnancy, body size, or trauma may require you to adjust how and where you position yourself or your hands. Here’s how to handle the most common variations:
- Pregnant Women: The hand placement on the chest remains the same (center of the chest). However, if possible, place a wedge or cushion under the woman’s right hip to tilt her slightly to the left. This relieves pressure on the aorta and inferior vena cava, improving blood return to the heart.
- Obese Individuals: Finding the correct landmark can be harder. Locate the spot where the ribs meet at the bottom of the chest (xiphoid process) and move two finger-widths up. You may need to press harder to achieve the required 2-inch depth.
- Trauma Victims: If the victim has a chest injury or flail chest, hand placement might need to be slightly adjusted to avoid directly compressing a fracture if possible, but remember: circulation takes priority. High-quality CPR must be performed even if it risks further rib damage.
- Barrel-Chested: For individuals with conditions like COPD who have expanded chests, ensure your hands are strictly centered to maximize heart compression against the spine.
What to Focus on During Chest Compressions?
Once you have your hands placed correctly on the victim and begin compressions, you become the mechanical pump for their heart. This is a critical step, and your role here is simple but crucial: maintain quality and consistency. Here are the steps to follow:
Minimize Interruptions
Any pause in compressions causes blood pressure to drop significantly. Stop compressions only when necessary, such as when the AED is analyzing or during ventilation breaths (if trained). Many protocols emphasize “Chest Compression Fraction,” which means maximizing the time spent compressing. Make it a habit to switch compressors quickly (within 5 seconds) to avoid long pauses.
Maintain the Correct Rate
Most guidelines recommend a compression rate of 100 to 120 beats per minute. This speed allows the heart to fill with blood and be emptied effectively. Compressing too slowly won’t generate enough blood flow, while compressing too fast doesn’t allow the heart to refill. Use the beat of the song “Stayin’ Alive” to help maintain the correct CPR rhythm. So, follow the tempo exactly, no need to guess or rush.
Ensure Full Chest Recoil
After every push, you must let the chest rise back to its normal position. This “recoil” pulls blood back into the heart so it can be pumped out on the subsequent compression. If you lean on the chest or fail to lift your weight off between pushes, the heart stays compressed and cannot fill. This significantly reduces the survival rate. Resume full lift immediately after every downward push.
Push to the Correct Depth
For adults, you must compress the chest at least 2 inches (5 cm) but no more than 2.4 inches (6 cm). If you press too shallowly, blood won’t reach the brain. If you press too deeply, you risk injuring internal organs. Loudly count your compressions to keep track and ensure you are pushing with sufficient force. Don’t be afraid of cracked ribs; the priority is circulating oxygenated blood.
Common Mistakes to Avoid
- Bending Elbows: This reduces the compression force and tires you out quickly. Keep arms locked.
- Hands Too Low: Pressing on the xiphoid process (the very bottom tip of the breastbone) can damage the liver or spleen.
- Bouncing: Lifting your hands completely off the skin can cause them to shift position. Keep the heel in contact with the chest while relieving pressure.
- Leaning: Failing to let the chest recoil prevents the heart from refilling.
- Looking Around: Keep your eyes on the chest to monitor depth and recoil visually.
How to Adjust Hand Placement for Children and Infants?
CPR is not just for adults; the techniques must be adapted for children and infants to prevent injury while ensuring adequate circulation. However, you must make sure to follow the right-hand technique and depth to avoid any mishap. Infants and children have smaller, more fragile skeletal structures, so precise placement matters in these cases. Here are some additional things to keep in mind:
Hand Placement for Children (1 to Puberty)
For small children, using two hands might apply too much force. In these cases, you can use the one-handed technique. Place the heel of one hand on the center of the chest (lower half of the sternum). If the child is larger or you are becoming fatigued, you can use the standard two-handed adult technique. The compression depth should be approximately 2 inches (5 cm), or at least one-third the chest depth. Do not use excessive force. The goal is adequate compression without unnecessary trauma.
Hand Placement for Infants (Under 1 Year)
When you perform CPR on infants, the anatomy requires a much more delicate approach. The safest and most effective method for a single rescuer is the two-finger technique. Place two fingers (index and middle) in the center of the chest, just below the nipple line. Ensure your fingers are upright to press straight down. Compress about 1.5 inches (4 cm) deep. If you push too low, you risk damaging the liver.
Two-Thumb Encircling Technique
If there are two rescuers present, or if your fingers tire, you can use the two-thumb encircling technique for infants. Place both thumbs side-by-side on the center of the infant’s chest, just below the nipple line, with your fingers encircling the infant’s torso for support. This enables you to control the depth and provide consistent pressure.
Depth Considerations for Smaller Bodies
The chest of an infant or child is much more pliable than an adult’s. Pressing too deeply can cause internal injury. For infants, the limit is 1.5 inches. For children, it is 2 inches. Always judge the size of the patient; a large 8-year-old may require adult-style compressions, while a small child may only need one hand.
What You’ll Learn in CPR/AED Certification
During CPR/AED certification training, you’ll learn:
- When to switch from two hands to one hand for children
- Correct finger placement landmarks for infants
- Hands-on practice with adult, child, and infant manikins to build muscle memory
This practical training ensures you’ll know exactly what to do, rather than relying on guesswork in emergencies.
What are the 7 Essential Steps for Effective CPR?
Performing CPR effectively means following a step-by-step process. Every action you take plays a key role in the successful outcome. On that note, here is a list of steps you must follow when using manual resuscitation to revive victims:
Step 1: Assess the Scene and Victim
Ensure the environment is safe before approaching the victim. Look around for hazards like traffic, fire, or gas. Once secure, approach the person and check for responsiveness by tapping their shoulders and shouting. Look for normal breathing, and if the person is unresponsive or only gasping, they are likely in cardiac arrest. If you are alone, prepare to act immediately.
Step 2: Call Emergency Services
Call 911 immediately, or have someone nearby call it. Provide accurate details about the location and the victim’s condition. Simultaneously, ask someone to bring the nearest AED if it isn’t already at hand. An early call ensures professional help is on the way while you assist the patient. Also, tell someone to keep the line open if possible. Early intervention dramatically improves survival rates.
Step 3: Position the Victim
Ensure the person is lying on their back on a firm, flat surface. If they are face down, carefully roll them over, protecting the head and neck. You cannot perform effective chest compressions on a person who is sitting up or lying on a soft bed.
Step 4: Locate Hand Placement
Quickly remove or cut away bulky clothing covering the chest to see the landmarks. Place the heel of one hand on the center of the chest, on the lower half of the breastbone. Place the second hand on top and interlock fingers. For infants, find the spot just below the nipple line.
Step 5: Begin Compressions
Once your hands are in place, begin pushing hard and fast. Do not hesitate. Push straight down to the required depth (2 inches for adults/children, 1.5 inches for infants) at a rate of 100-120 compressions per minute. Loudly count “1, 2, 3…” to keep your rhythm steady.
Step 6: Deliver Breaths (If Trained)
If you are trained in CPR and have a barrier device, deliver 2 rescue breaths after every 30 compressions. Tilt your head back, lift your chin, pinch your nose, and seal your mouth over theirs. Watch for chest rise. If you are not trained or do not have a mask, perform Hands-Only CPR (compressions only). Do not delay compressions for more than 10 seconds to give breaths.
Step 7: Continue Until Help Arrives
Continue cycles of 30 compressions and 2 breaths (or continuous compressions) until an AED arrives and is ready to use, emergency responders take over, or the person starts showing signs of life. Do not stop because you are tired; if possible, switch with another bystander every 2 minutes to maintain compression quality.
Quick Mnemonic to Remember the Steps: C-A-B
- Compressions (Push hard and fast)
- Airway (Open the airway)
- Breathing (Give rescue breaths)
What to Do If the Person Starts Breathing Again
If the person begins breathing or regains consciousness, place them in the recovery position, on their side with their mouth open slightly angled downward to keep the airway clear and reduce aspiration risk. Stay with them and monitor their breathing until emergency responders arrive. Be prepared to start CPR again immediately if breathing stops or becomes ineffective.
Conclusion: Master CPR Hand Placement
Knowledge of correct CPR hand placement is all about saving lives. If you are a first responder, you may have to assist an adult, child, or infant. Hence, being prepared and informed can help you improve survival outcomes during sudden cardiac arrest. Each step you learn about hand positioning and compression depth increases the likelihood of the person’s survival.
Most employers require valid CPR/AED certification for compliance and safety. So, get CPR/AED certified online today and practice real-life compression scenarios from the comfort of your home. By learning these skills and techniques, you can be the reason someone gets a second chance at life.